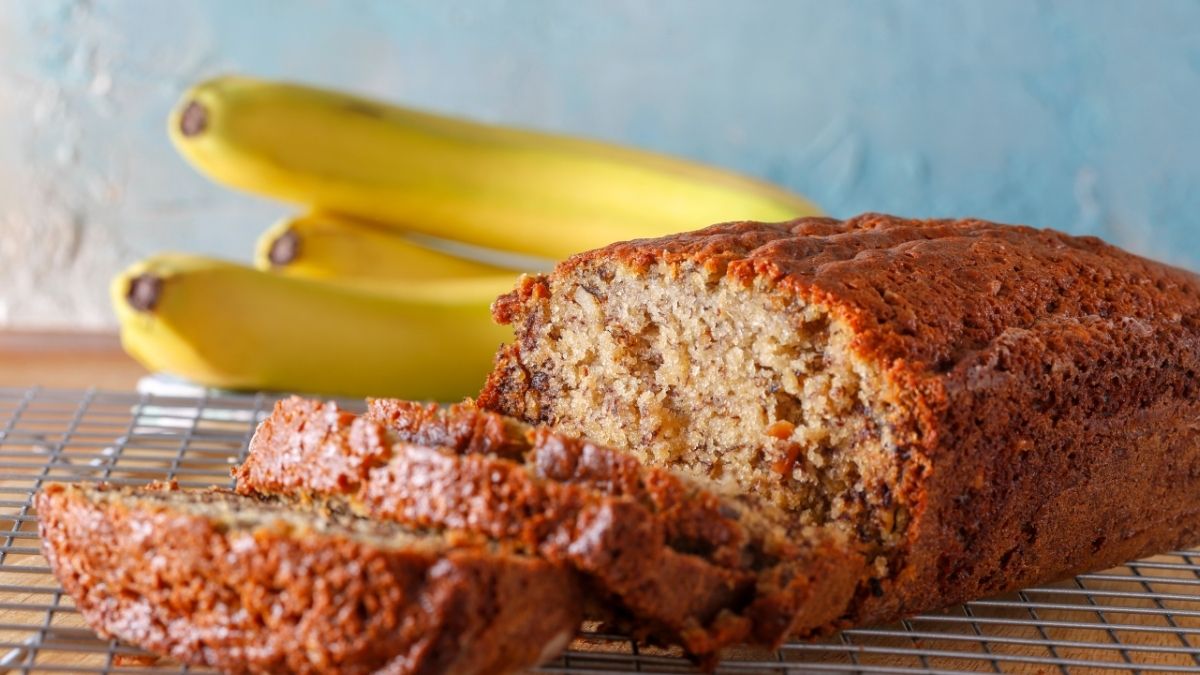
The Best Sugar-Free Almond Milk Banana Bread (So Moist!)


Banana bread is one of those recipes I come back to again and again. It’s comforting, it uses up those overripe bananas sitting on the counter, and it makes the whole house smell amazing. But most importantly? It’s reliably delicious every single time.
This version has become my new go-to since I discovered how well sugar-free almond milk works in baking. The result is incredibly moist, naturally sweet from the bananas, and has that perfect tender crumb you want in a really good loaf.
Why I Love This Recipe
I’ve been sharing recipes on Julie’s Cafe Bakery since 2021, and I’ve tried a LOT of banana bread variations. This one stands out because:
- It’s genuinely moist (not dry like so many “healthy” versions)
- The sugar-free almond milk adds subtle flavor without overpowering the banana
- It keeps well for days (if it lasts that long!)
- It’s versatile—great for breakfast, snacks, or dessert
- Kids love it, which is always a win
The Sugar-Free Almond Milk Secret
Here’s what I discovered: using Orasì Sugar-Free Almond Drink instead of regular milk gives you a cleaner banana flavor. There’s no competing sweetness, and the slight nuttiness from the almonds actually complements the bananas beautifully.
Plus, it keeps the bread wonderfully moist without making it heavy. That’s the sweet spot we’re looking for!
Ingredients
Dry Ingredients:
- 240g all-purpose flour (or 1:1 gluten-free flour blend)
- 1 tsp baking soda
- 1/2 tsp salt
- 1 tsp ground cinnamon
- 1/4 tsp ground nutmeg (optional)
Wet Ingredients:
- 3 large very ripe bananas (about 350g mashed)
- 80g honey or maple syrup
- 100ml sugar-free almond milk
- 80ml vegetable oil or melted coconut oil
- 2 large eggs
- 2 tsp vanilla extract
Optional Add-ins:
- 75g chopped walnuts or pecans
- 100g chocolate chips
- Handful of dried cranberries
Step-by-Step Instructions
Step 1: Prep Your Pan
Preheat your oven to 175°C (350°F). Line a 9×5 inch loaf pan with parchment paper, letting the edges hang over the sides for easy removal later. Or grease it really well—your choice!
Step 2: Mash Those Bananas
In a large bowl, mash your bananas with a fork. Don’t worry about getting them completely smooth—a few lumps add nice texture. The riper your bananas, the better. We’re talking spotty, almost-too-far-gone bananas. That’s when they’re sweetest!
Step 3: Mix Wet Ingredients
Add the honey (or maple syrup), sugar-free almond milk, oil, eggs, and vanilla to the mashed bananas. Whisk everything together until well combined. The mixture might look a bit strange at this point—totally normal!
Step 4: Combine Dry Ingredients
In a separate bowl, whisk together the flour, baking soda, salt, cinnamon, and nutmeg. Make sure everything is evenly distributed.
Step 5: Gentle Mixing
Pour the dry ingredients into the wet ingredients. Using a wooden spoon or spatula, gently fold everything together until just combined. You should still see a few streaks of flour—that’s perfect! Overmixing makes tough, dense banana bread.
If you’re adding nuts, chocolate chips, or dried fruit, fold them in now. Save a small handful to sprinkle on top for a pretty finish.
Step 6: Bake
Pour the batter into your prepared loaf pan and smooth the top. If you saved some nuts or chocolate chips, scatter them over the top now.
Bake for 50-60 minutes. The bread is done when a toothpick inserted in the center comes out with just a few moist crumbs attached. If the top is browning too quickly, tent it loosely with foil for the last 15-20 minutes.
Step 7: Cool (The Hard Part!)
Let the bread cool in the pan for about 10 minutes, then use the parchment paper to lift it out onto a wire rack.
Now comes the truly difficult part: you really should let it cool completely before slicing. Warm banana bread tends to be gummy and doesn’t cut cleanly. But if you absolutely can’t wait (and I totally understand), at least give it 20-30 minutes.
My Best Tips
Use VERY Ripe Bananas: The more spotty and brown, the better. If your bananas aren’t ripe enough, you can speed things up by baking them at 180°C for 15 minutes.
Room Temperature Ingredients: Take your eggs and almond milk out of the fridge 30 minutes before baking. Everything mixes together more smoothly.
Don’t Overmix: This is crucial! Stir until just combined. Some lumps are fine.
The Toothpick Test: A few moist crumbs = perfect. Wet batter = needs more time. Completely clean = might be slightly overbaked.
Line Your Pan: Even if it’s non-stick! The natural sugars in bananas can stick like glue.
Storage Tips
Room Temperature: Wrap tightly in plastic wrap or store in an airtight container for 3-4 days. It actually gets better after a day!
Refrigerator: Keeps for up to a week. Let it come to room temperature before eating, or warm it slightly.
Freezer: Wrap individual slices in plastic wrap, then put them all in a freezer bag. Keeps for up to 3 months. Pull out a slice the night before for breakfast, or microwave for 20-30 seconds.
Serving Suggestions
For Breakfast:
- Toasted with butter and a drizzle of honey
- With cream cheese spread
- Alongside your morning coffee or tea
For Snack Time:
- As is—it’s perfect on its own!
- With a smear of almond butter
- Warmed up with a scoop of vanilla ice cream
For Dessert:
- Served warm with whipped cream
- Topped with fresh berries and Greek yogurt
- With a dusting of powdered sugar (if you’re not watching sugar)
Variations to Try
Once you’ve mastered the basic recipe, try these twists:
Chocolate Chip Banana Bread: Fold in 150g chocolate chips. This is dangerous because you’ll want to eat the whole loaf.
Nutty Banana Bread: Add 100g chopped walnuts or pecans for extra crunch and protein.
Blueberry Banana Bread: Gently fold in 150g fresh or frozen blueberries. Be careful not to overmix or everything will turn purple!
Peanut Butter Swirl: Dollop 4 tablespoons of peanut butter on top of the batter and swirl with a knife before baking. Absolutely delicious.
Coconut Banana Bread: Replace 50ml of almond milk with coconut milk and add 50g shredded coconut to the batter.
Troubleshooting
Bread Sinking in the Middle? Usually means too much liquid or underbaking. Make sure you’re measuring accurately and test with a toothpick.
Too Dry and Crumbly? Either overbaked or not enough banana/liquid. Check your oven temperature with a thermometer—ovens can be off by quite a bit.
Dense and Heavy? Overmixing is usually the culprit. Remember: lumpy batter is your friend!
Burnt Top, Raw Middle? Your oven might be too hot. Lower the temperature by 10-15 degrees and tent with foil if the top browns too quickly.
Why This Recipe Works
There are thousands of banana bread recipes out there, so why this one?
Honestly? Because it just works. Every. Single. Time. It’s reliable, uses simple ingredients, and genuinely tastes better than the sugar-loaded versions.
The sugar-free almond milk keeps it moist without adding unnecessary sweetness. The bananas provide all the sweetness you need (along with a touch of honey). And the texture? Absolutely perfect.
It’s become one of those recipes I can make without even looking at the measurements anymore. And that’s when you know you’ve found a keeper.
Final Thoughts
If you’ve got overripe bananas on your counter and you’re wondering what to do with them, this is your sign to make this bread. If you’re trying to cut down on sugar but miss having something sweet with your afternoon tea, make this bread. If you just want your kitchen to smell amazing and have something delicious to offer guests (or keep all to yourself), definitely make this bread.
It’s comfort baking at its best—easy, reliable, and delicious. The kind of recipe you’ll make so often you’ll stop needing to look at the instructions.
And that’s exactly what a great recipe should be.
